


DIY Electrical Deeming You Roadworthy: How to Find an Electrical Short in Your Car
When everything is working correctly during the daily drive, the electrical systems in our cars allow us to enjoy many “comfort necessities!” Interior lights, the tunes of your choice, and other modern perks are all available at the touch of a button. If a short occurs in your car, long-term issues can make things dangerous and affect its value. This guide will provide you with the know-how to locate an electrical short, even if you are just a bit short on experience.
Pop-Up Information Station: How Circuits Work
A short circuit occurs when a wiring harness shifts electric current before it reaches the correct destination. Sensor circuits handle various functions such as speed, light, and oxygen. Actuator circuits handle other elements such as lights and the motor. When the wiring is intact, current is allowed to flow freely between the two components. If a short circuit takes place, the correct flow is interrupted, and some vital components could malfunction.
How to find a short in your car:
Short-to-ground circuits occur when a current flows from the circuit to the car’s body. Shedding insulation and other wear can cause the current to “take a detour” from the wire directly to the vehicle itself. You may spot components not operating, or fuses physically blown out in this instance. Most engine management sensors are two-wire circuits with a 5-volt reference, auxiliary ground wire, and signal return.
Short-to-power circuits usually occur in the harness itself, where multiple circuits exist in clusters. When a damaged wire contacts another, the current can jump to unintended places. This can cause power surges in places such as the horn or engage your headlights when you apply the brakes. Modern luxury cars yield about 1,500 wires to recyclers at their life’s end, which is nearly an entire mile’s worth!
Understanding the difference between the two will help you identify which type of short you are up against. Nailing down the exact location can take some time and a select few pieces of equipment. The EWD is a useful color-coded chart that maps out your car’s electrical system. A multimeter is a test light that also aids you during this process.
Damage control 101: beginning the troubleshooting process:
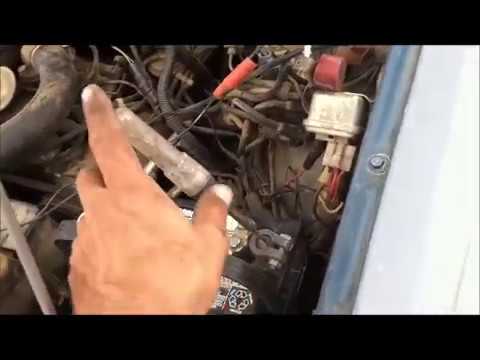
When you first open your car’s wire harness, the EWD will identify the circuits you see at first glance. Even for a newbie, it’s comforting to know that wire colors are noted in the EWD. Now, you can confidently check fuses to see if any short circuits are immediately obvious. You can randomly pick out one and connect your test light to the socket. If the current is flowing correctly, the test light will light up.
The multimeter functions as a tool to help measure current in the same way. If the light does not illuminate, you can begin to deduct that current has stopped flowing to that fuse. The faulty wire may certainly exist along this path. At this point, you can examine a few wires with a necessary suspicion that they may have “fallen asleep on the job!”
The all-important fault inspection:
Once you can determine that an issue is with a particular wire, disconnect it at one of its sensor endpoints. You can now use your test light to see when it fails or be alert for your multimeter to stop beeping. To narrow down where the fault has occurred, you can examine for the stoppage in current flow to determine whether it’s closer to the sensor or load. If you reconnect a wire and fuse for the headlights and the test light goes out, you can narrow down the issue to the area between the switch and the load.
Determined and diagnosing what’s immediately visible:
Now you can open the car’s paneling and take a closer look at the wiring. While you are scanning the immediately visible wires, you may be able to spot one that is frayed that you can repair on the double. Many models have wiring that is stealthily hidden, so may have to examine a few panels to locate the problem. If it looks like a 5-volt circuit is the culprit, disconnect your battery and the ECM first.
Then, you can use the multimeter to measure the continuity between the circuit and the car body. Some circuits will need the continuity measured with the engine instead of the body. After you have narrowed down the problem, repairing the wire’s casing could prove to be a quick fix. Other issues may require you to replace the wire entirely.Insulated connectors can be melted to the wiring before the electrical tape is applied for extra protection.
Conclusion:
Depending on the current’s strength, a short circuit can cause smoke, crackling, and even dangerous flames. We hope this guide provided some insight on how to identify and tackle an electrical short in your car. Even if you don’t master the task right away, at least you don’t have to feel as if you are hunting for the problem unprepared. Tell us in the comments below about your experiences with DIY repair, or check out another article here about finding the right mechanic!


Interesting article, nerve racking to think that a short circuit is actually capable of causing a fire or other dangerous possibilities. I also wasn’t aware that cigarette lighters are one of the most common shortages due to people charging their phones.